Monday, March 31, 2014

Altered Frame & Embossed Accents

This project has been sitting on the back burner for a few weeks now, but until recently it didn't really come together. At first I couldn't decide which Embossing Enamels to use, then it was deciding which Accents to use (there are so many choices!) - there was always something not quite right...have you ever had that much trouble getting a project to work?

Today the stars aligned and I love this mini frame!

"Together is my Favorite Place to Be"

I wanted something vintage-ish, clean not grungy. Worn and well loved was what I had in mind...


Let's get our supplies!

Globecraft & Piccolo:
Butterfly & Flowers Accents (A153) (or you could use Tiny Hearts, Flowers, Stars & Flourishes A144 or any other set with a small heart)
Vintage Lock & Keys Necklace (CA125)

Thrifted silver frame
Foam tape
cotton (crochet) thread
scrap patterned paper
heart punch
printed sentiment

The How To:
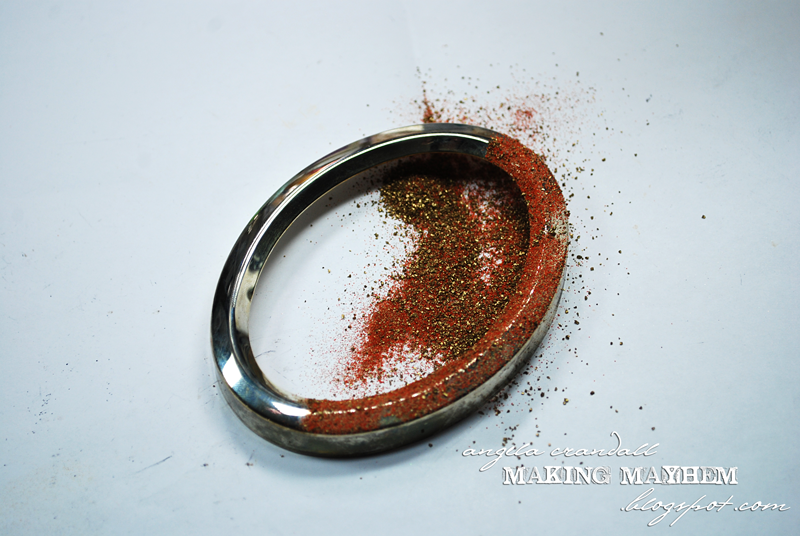
This project is pretty straightforward. Begin by dabbing on some Embossing Powder Adhesive Fluid and then emboss the frame with the Gilded Rose Gold. Don't be too precise. You want to leave areas unembossed. Tip: once the metal frame begins to get hot, you can dip the frame into a pile of the embossing powder without the adhesive.


I didn't have any more tiny hearts, so I used a small flower accent and snipped 2 petals into the shape of a heart. The book board cuts cleanly with scissors.


Using the adhesive fluid and embossing enamels, emboss, the heart, the lock and the key 2-3 times. Tip: to get the texture on the lock - melt 2 layers, while the surface of the lock is still hot, dip the face of the accent into the embossing powder. Heat only just enough to make the powder stick.

Punch out a heart from the scrap paper. Print your sentiment and then trim out the words. (I used a free font: Jane Austen for a little old world writing.) Distress all the edges using Vintage Photo Distress Ink.


Adhere the papers and accents using the Glastique. Use a small brush for the word strips.


 I wanted the frame to have a kind of shadow box effect, so I layered foam strips. (When I was putting the frame together, I had forgotten to account for the thickness of the glass, so I ended up only using 2 strips of foam.) 

String up the key and place one string between the foam strips and the other string over the top. Secure both strings on the back of the white cardstock.

Put the frame back together. That's it!


Stop by every day to see more Design Team inspiration! Don't forget to leave a little comment love and let us know how we're doing!

Inky hugs,
Angi


Sunday, March 30, 2014

Piccolo Vintage Tag


Sandy here with you today and I have created a vintage tag.  I began with a manila tag to which I added some blue paint.  Then using Versafine Vintage Sepia ink, I stamped Sweet Stamps Italian Writing so it covered the tag.  I stamped Parisienne Collage ATC again with Vintage Sepia onto Cryogen white card stock. 


I heat embossed both the frame and two of the corners from the new Piccolo Vintage Corner Flourishes with  Victorian Bronze enamel.  The frame is the perfect size for an ATC.  Be sure to click on the picture for a closer look at this luscious embossing enamel.


The last step was a few flowers and I was done.  Be sure to visit our Globecraft Piccolo blog each day for more inspiration from the design team. 

Saturday, March 29, 2014

Imagine Peace Pendant


For my Globecraft & Piccolo post today I made this pretty pendant. I think visualization can be a powerful tool in your arsenal and I wanted to create something that would make people stop and look. Hopefully, the bright colors  will catch some attention!

The pendant was simple to make and all you need to make one is:
All ready to go!
First you want to emboss your pendant with the Vintage Silver Embossing Enamel 2 or 3 times – take care to roll your bottle of embossing enamel before using as this mixes up the little pieces of powder – and use Embossing Fluid between each emboss.  Before you emboss the pendant the final time, select your rubber stamp (I honestly don’t know if polymer stamps are ok doing this technique) and cover it liberally with the embossing fluid so your stamp won’t stick to the pendant.  You have to be quick doing this step - emboss your pendant the final time, them push your stamp into the still warm Embossing Enamel. Leave the stamp there for a bit; it will pop off when the Embossing Enamel gets cool. 
Texture!!
This creates such a cool effect and texture! 
Then pick out your embellishments for the pendant.  I chose a small butterfly from Butterfly Accents, and embossed that with Royal Sterling.  I wanted to put a heart somewhere but I didn’t have one that I felt was the right size, so I used my small heart punch on some sturdy silver paper.  I then edged the heart with Girls Night Out Embossing Enamel.  I also chose a key from 1” Mini Key Charms and embossed that with Mermaid Tears.  Mermaid Tears is such an unusual color – it reminds me of abalone shells as it is almost holographic.  You really need to see it in person to appreciate the beautiful, subtle purples & pinks that it creates.  When I put the key next to the Vintage Silver, the key took on the color of silver and I wanted it to stand out a bit more so I sprinkled just a bit of the Deep Blue Sky Embossing Enamel onto the key.  It really looks stunning in person but Mermaid Tears is a very difficult powder to catch on film (or whatever you call digital film).

I chose the words Imagine Peace from the Remnant Rubs and applied that directly onto the pendant first. 

 
Once it was applied, I used a tiny bit of Glastique Gloss to cover the sentiment; I just brushed on with a paintbrush.  I fiddled with the embellishments until I pleased with the placement and glued all of them to the pendant.  I dipped my paintbrush into the Glastique Gloss again and brushed a quick coat over the entire pendant.  Let it dry, added a jump ring and I was done.
If you look closely at the key, you can see the Mermaids Tears color on the tip of it.
I love this pendant and what it stands for! I hope you enjoyed your visit to my blog.  Please consider following the Globecraft & Piccolo blog - there is a brand new post every day! Thank you & have a peaceful day ~ Christi
 

I appreciate the comments people leave and I will comment you back!

Friday, March 28, 2014

Sweet Little Flower Pendant

Hello my fine feathered friends! Aimee here with a super sweet, shabby chic-ish pendant to share with you.


This came together so quickly- literally 20 minutes and it was finished. It takes longer for the E600 glue to set than it does to create this cutie! 

Supplies:
Piccolos LA106 Lacey's Stacking Flowers 
Enamel Powder Adhesive Fluid
Enamel powders: Aged Pink & Aged White
Glastique- both matte & glossy
E600 glue
Cord necklace 
Glue on bail
Toothpick
Clamp or clothespin
Heat gun
Bling or pearl for flower center (this flat backed pearl is from Close To My Heart)
Paintbrush 

Let's make it!

1. Punch out three sizes of flowers.


2. Coat each flower with adhesive fluid. Coat largest & smallest flowers with Aged Pink and the middle sized one with Aged White. Heat them up to melt the powder and activate the adhesive.


3. Coat the two pink flowers with matte Glastique and the white one with glossy Glastique. 

4. Start stacking! Use E600 glue to adhere the flowers together and use a clamp or clothespin (or even place under a heavy book) to hold them down for a few minutes to ensure a good hold. 


5. Glue the bail onto the back of the flower stack using E600. Be sure to clamp it down for a couple of minutes to ensure a good hold!

6. Add your flower center, string onto a necklace, and wear it! :) 


Thursday, March 27, 2014

Glory ---- Grace and Glory

Good Morning.  Teresa here again today. It is the Easter season and I have a quick little card for you today. 


First - let's shop 
- a frame piccolo - I used one from this set but several of them have these frames

- Smooch Ink in Chocolate Cherry (from SweetStamps)
- A flat back Pearl Accent (also from SweetStamps)

A card blank of your choosing
Music Paper for the Background 
a canvas atc blank 
Rust Colored Walnut Dye Ink
Your favorite all purpose adhesive. 


First I painted the cross with the Smooch Ink and let that dry.


Emboss the frame with the Mardi Gras Embossing Powder - I love the purple in this powder.


Color the canvas ATC blank with the Rust Dye Ink and let dry.

Then use the embossing adhesive and the Mermaid Tears Enamel on the canvas blank  ----mmmmm love the way this sparkles.


 Glue the music sheet to the card -  then the canvas and the frame. Add the cross and an appropriate word from the song title. I also added the pearl to the center of the cross.


Ready to send a lovely message to a friend.


Wednesday, March 26, 2014

A Spring Ornament


 Happy Wednesday everyone! leslierahye  sharing a fabulous Spring ornament. This project features the new pearl gel enamels along with some great Piccolos including the Chocolate Bunnies, the Tiny Flourishes and the Daisies.  I hope you enjoy!

Globecraft & Piccolo Products used
*=new release item

I adhered the chipboard pieces to book paper with Glastique I coated the Bunny with Burnt Umber Gel Enamel. once the frame was dry, I trimmed it out, sanded the edges and then brushed on a thin layer of the Burnt Umber Gel Enamel to tint the frame brown. 

The color on the flowers was added with a brush to get all the details of the dainty daisies.

Edges of the frames and the center frame for the ornament were heat embossed with Victorian Bronze.
Punches were diecut from the Bunnies and Chicks Cheery Lynn Border. I used book paper covered with heat set Aged Pink Enamel. They were added to the globe ornament for "confetti". The Bunny and daisies were added to the globe and the whole thing was glued shut with Beacon 3-in-1 to hold it tight. A pink hemp string was added to the ornament for a hanger.

I hope you enjoyed my project! Thank you for stopping by today!

Tuesday, March 25, 2014

Butterfly card

Morning everyone Tracy here. 
I have a card to show you this week that I have created using Mermaid Tears Embossing Enamel and the lovely Fanciful-Butterflies stamp set from Sweet Stamps. 


To change the colour slightly I used a bright pink pigment ink as a base, I was surprised at how much this changed the colour of the powder, especially on the butterflies. 
The powders worked perfectly with this stamps, which is brilliant because they have some fine detailing. 
I hope I have inspired you to have a play with your Enamel powders. 
Happy Crafting :) 

Monday, March 24, 2014

Altered Clothes Pins

Now that Spring is officially here, I have been on the lookout for fun ideas that involve plants and pots and found a project that is definitely my kind of art - it involves creativity, things I have around the house and can be made in a short amount of time!


Isn't this a great planter?! 

Let's get our supplies!

Globecraft & Piccolo:


Tuna can, cleaned & dry
19 clothes pins (or enough to go around your can)
Various word stamps
Archival Ink Jet Black
Distress Stain Tattered Rose
Distress Stain Picket Fence
Distress Ink Vintage Photo

The How To:
Start by pouncing the Adhesive Fluid around a small portion of the can. Because the can is nonporous, the fluid will bead up and create your random splatter. Easy peasy! Roll the bottle of embossing enamel. Sprinkle on the enamel and heat. (Be careful! The can will get HOT!)


While you are waiting for the can to cool, work on the clothes pins. I dabbed some Distress Stain in Tattered Rose. (My pins were coated, so they didn't absorb the color well. Next time I will lightly sand the clothes pin faces.)

Dab Adhesive Fluid only onto the bottom portion of the pins. Melt the powder and set pins aside to cool. Love the silver in the Temple Stone powder and how it all comes together now!


Lightly swipe the Picket Fence Distress Stain across the pins and let dry. Using your favorite blender, apply Vintage Photo Distress Ink to the sides.


 Using your favorite word stamps & Archival Ink, add words to the pins. (I used stamps from Studio Calico, 7 gypsies, Stampin' Up!, Studio G...) Let dry.

At this point, I adhered Piccolo Accents with Glastique. After the embellishments dried I added Glastique to the tops of the accents to add shine and durability.

Time for the 3D Enamel Gels! Apply the gel to one or two of the small portions of the pin. Let dry.

If I decide not to use this as a planter, I can easily use this as a pencil/pen/marker cup. If I add magnets to the pins I could use this on a metal board or refrigerator...oh the possibilities!


Love the gloss of the 3D gels on the clothes pin tips!


Use number stamps for special dates, times, addresses...


Even if the whole stamp doesn't fit onto the clothes pin, you might be able to use! See the chevrons?


I think I'm going to have to make a few more of these to contain the mint!

Inky hugs,

Sunday, March 23, 2014

Happy Easter


I have a fun Happy Easter card for you today.  I began with a white 4.25 x 5.5 inch card base.  I added a DP background from my stash.  I die cut the largest of my Cheery Lynn Designs Nesting Eggs, heat embossing it with Piccolo Aged Pink Enamel Powder.  I wanted a rough texture so while the embossing powder was still hot, I added additional powder.  I think is has a nice egg shell look. 


Using the new Piccolo Spring Accents chipboard set, I embossed the leaves of the flowers with Shamrock Dreams Embossing Powder and added Rose Pearl 3D Enamel Gel to the petals.  I used Lemon Butter 3D Enamel Gel on the sun. 


I used Victorian Bronze Enamel Powder to heat emboss the cute Chocolate Bunnies Piccolos.  The last step was my words, Cheery Lynn Designs Happy (set of 2) Easter (set of 2), also heat embossed with Shamrock Dreams.  Be sure to visit us each day for more inspiration from the design team. 

Saturday, March 22, 2014

Spring Flowers. . .


Side 1
I had so much fun using the French Oval Bubble Frame Kit to make my Spring Scene that I made this Spring Flowers ornament using another kit that Globecraft & Piccolo manufactures.  There are actually four different Ornament Kits so you can find one to perfectly suit your needs.  


Spring is in the air and I can't wait for the flowers to start blooming!


Side 2
That is one of my four cats, Junior, in the background.  He is enjoying the window!

What I used:


As you can see, I decorated both sides of this ornament; one side is so full of flowers you can’t see the background and the other side I used Distress Markers in Peeled Paint & Mowed Lawn, on the craft sheet, spritzed them, and placed the ornament “back” on it so the background was a nice springy green.  I am calling the green side of the ornament side 2 just so I can be clear on how I decorated each side.

TONS of Flowers!!

When I was looking at all the flowers I had I decided to see if I could emboss one of them to match my project.  I took a pink mulberry flower and used both Enchanted Aubergine & Girls Night Out Embossing Enamel on it and it came out fabulous! I let that cool while I worked on some other flowers.  I also colored one with a Distress Marker in Dusty Concord.  I took my flowers that I was going to use on side one and dotted the centers with White 3D Gel Enamel.  Once they dried (I let them sit overnight just to be sure the dots dried thoroughly) I put some jewels on some of the centers of the flowers and I left some just white.  I placed the flowers where I wanted them and adhered them to the side 1 of the ornament middle.  


Since I used so many flowers on side 1, I decided to go easier on side 2.  I picked out a few more flowers and leaves, attached gems to the centers of the flowers and glued them to the green background. 

The two outer frames

I used the rim as a guide and cut out paper to cover it using the KaiserCraft Violet Crush paper.  I embossed the outer ring (the one that has the hole for hanging), on both sides, with Enchanted Auberguine Embossing Enamel, pieced the ornament together and let it dry (with the help of some binder clips). It is very simple to put the ornament together; it looks harder than it is!

Another view of side 1


I think it came out really sweet (but I honestly should of used less flowers on side 1) and I hope you enjoyed my little tutorial.  The Bubble Ornaments are SO fun to make and they come in so many sizes; I am already planning my next one!
Another view, side 2, no bubble
I'm not sure why the Aubergine Embossing Enamel came out looking so dark in some of the pictures.  It really is a beautiful color, much more purple than what shows (could just be my monitor. . .).

Thanks for stopping by everyone! I appreciate your comments & thoughts ~
Fondly, Christi