Saturday, September 29, 2012

Happy Birthday, Happy Birthday, Happy Birthday

Good morning, Steph here with a fun card that uses the outer frame that surrounds the flourishes in Decor Style #11,   Every bit of this set can be used in so many different ways.  I coated the frame with Copper Kettle and since I wanted a masculine feel, I then embossed it with a Cuttlebug Embossing folder.  Once embossed, I wiped black ink across the raised sections.


I cut black cardstock 6" x 12" and scored in half to create the card, then cut the pattern paper to fit the frame.


The image was stamped with Memento Black Ink on off-white cardstock, then cut out and matted with red cardstock. The sentiment was stamped repeatedly on the border which was cut to fit inside the frame.


Remember, EVERY piece of bookboard in the package is useable. What will you create today?


Friday, September 28, 2012

Final Day with our Friends from Xyron...

We're creating with our friends from Xyron all this week! We're so excited to share some inspiring projects and tips and tricks for using Xyron adhesive products with Globecraft Memories' Piccolos, Enamel Powders, and more!


After checking out all our projects here, head on over to the Xyron blog for more crafty inspiration!

Today, Jennifer Priest shares a spooky globeframe ornament to make this Halloween scream "eek!":


This ornament canbe hung on a door knob, wreath hanger, or from a candlestick. Here I added some glitter spiders from dollar store to the candle for a fun centerpiece or mantel decoration:

Want to know how I did it? Here's a video!! Enjoy!


Supplies:
  • Adhesive - Xyron Sticker Maker, 3D Foam by American Crafts
  • Enamel Powders, Frame, Piccolo Chipboard Flourish - Globecraft Memories
  • Fabric, Seam Binding - Joann, Michael Levine
  • Kraft Label - Maya Road
  • Epoxy Shape - EK Success
  • Cat Image - Found Online, Cut out with Silhouette
  • Adhesive Gems - Want2Scrap
  • Googly Eyes - Darice
  • Alpha Stickers - Authentique Paper
  • Pin - Tim Holtz
  • Lace, Glitter, Beads, Bling, Metal Findings, Vintage Seed Beads - hydrangeahippo.etsy.com


Did you know you can save 25% off on our website every day with this code? Check it out!


And, what's a hop without a giveaway??!! 


Use the Rafflecopter widget below to enter to win a Piccolo Prize Pack filled with your choice of any 4 packs of Piccolos!! Be sure to "like" and "follow" our friends at Xyron too!


Thursday, September 27, 2012

Xyron and Globecraft Team Up: Day 4: Spooktacular Wall Hanging

We're creating with our friends from Xyron all this week! We're so excited to share some inspiring projects and tips and tricks for using Xyron adhesive products with Globecraft Memories' Piccolos, Enamel Powders, and more!


After checking out all our projects here, head on over to the Xyron blog for more crafty inspiration!

Today, Stacy Rodriguez shares a spooky globeframe creation to make this Halloween scream!:

Hey there everyone, Stacy here to share my week Xyron and GlobeCraft Memories project with you.
For my project since Halloween is just around the corner, I altered one of the GlobeCraft Memory  Oval Bubble Hanging Frames to hang as a home decor piece.


I love the layers around the ovals, this allows you to place several different pattern papers.


You can do the same layer effect across the top of the frame as well, then simply pop up and embellies you have.


This project was super easy to do.  I ran the pattern paper through my Xyron 510 and then simply placed them onto the frames.  Once that was done I did a little file action so that all the pieces were smooth, ran them back through my 510 and put it all together.

GlobeCraft Memories Supplies: Fancy Oval Frames
Xyron Supplies: 510
Other Supplies:
Echo Park paper
Tim Holtz - Metal Skull
Bazzill - Ribbon
Thanks for stopping by today, hope you have a wonderful day!
~Stacy


And, what's a hop without a giveaway??!! 


Use the Rafflecopter widget below to enter to win a Piccolo Prize Pack filled with your choice of any 4 packs of Piccolos!! Be sure to "like" and "follow" our friends at Xyron too!


Wednesday, September 26, 2012

Xyron and Globecraft Memories Team Up: Day Three - Halloween Projects!

We're creating with our friends from Xyron all this week! We're so excited to share some inspiring projects and tips and tricks for using Xyron adhesive products with Globecraft Memories' Piccolos, Enamel Powders, and more!


After checking out all our projects here, head on over to the Xyron blog for more crafty inspiration!

Today, Cristal "Pinky" Hobbs shares a spooky creation to make this Halloween scream!:


Pinky here with a fun Halloween project today using the 


For this project I decided to ink the Piccolo chipboard for a spooky effect. 

 I used the Xryon Permanent Glue Stick to adhere to papers-
to the Piccolo frame to create the background and hills.  

 I also used the Xyron Permanent Glue Stick to adhere to framed scene to the card!
That's it! Easy and PERMANENT!!
I hope you enjoyed this Halloween project and we would love to see your
creations! Until next time~

Products Used:
Clearsnap Color Box Inks
Clearsnap Smooch Spritz
Core'dinations Card Stock
Graphics 45- Curiosity Shoppe

And, what's a hop without a giveaway??!! 


Use the Rafflecopter widget below to enter to win a Piccolo Prize Pack filled with your choice of any 4 packs of Piccolos!! Be sure to "like" and "follow" our friends at Xyron too!


Tuesday, September 25, 2012

Xyron and Globecraft Memories: Day Two, A date to remember


We're creating with our friends from Xyron all this week! We're so excited to share some inspiring projects and tips and tricks for using Xyron adhesive products with Globecraft Memories' Piccolos, Enamel Powders, and more!


After checking out all our projects here, head on over to the Xyron blog for more crafty inspiration!

Today, Linda Neff and Charlotte Jenkins share two cute projects that can work together!:

Hello, Charlotte here with you today to share a quick and easy gift bag using Piccolo Enamel Powder, Piccolo Card Decor and More Chipboard Charms, Xyron Permanent Adhesive Glue Stick and the Xyron Create a Sticker.

Globecraft Products
Piccolo Vintage Cooper Enamel Powder
Piccolo Enamel Powder Adhesive
Card Decor and More Birds and Butterflies Flourish

Xyron Products
Xyron Permanent Adhesive Glue Stick
Xyron Create a Sticker

Other Products
Tim Holtz Distress ink Aged Mahogany
Tim Holtz Regal Flourish Stamp
Scor-Pal Scoreboard
TPC Studio Boho Blooms Stamp
Bo Bunny Paper

                                                             Directions
Place a template on a piece of 12X12 paper. Trace the template. Make sure to mark folding lines. You can download a template online. I created my own for this project.

Cut out template with scissors. Using a scoreboard, score all lines. Fold all score lines as seen in the above photo or on the template pattern.

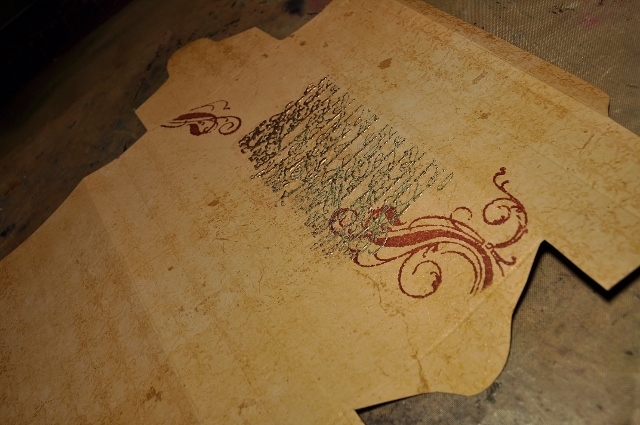
Ink a large word stamp with embossing ink. Stamp onto the front panel of the bag. Immediately after stamping the image, sprinkle Vintage Copper Enamel Powder over the stamped image and emboss the image. When cool, stamp a flourish stamp on the front panel with ink.
You are ready to start assembling the bag.  Run the Xyron glue stick over the 1/4" edge flap on the bag. Align edges together and adhere the edges together using the glue stick. Fold bottom flaps in and glue the flaps down with the glue stick. When bag is assembled, distress the edges of the bag with distressing ink.

Stamp a sentiment on a small piece of coordinating paper. Cut around the sentiment, using scissors. For this bag, I decided to cut out a circle. Distress the edges of the circle with distressing ink. I used the Xyron Create a Sticker to make a quick and easy sentiment sticker. Peel off the sticker from the Xyron paper and attach the sticker directly to the bag! No messy glue or runner tape..perfect! 

Add a paper bloom with the Xyron Glue Stick. Carefully remove a bird from the Piccolo Birds, Butterflies and Flourishes Piccolo Card Decor and More chipboard charms Ink the bird with coordinating ink and adhere to the bag using the Xyron glue stick.

Fold the top flap back over the bag opening. Punch two holes on the top of bag. Make sure to punch through all layers of the bag with the hole punch. Next, thread a coordinating ribbon through the holes and tie a bow.

Finished...easy, quick and pretty for the perfect gift..... Thanks for stopping by


Hi! It's me again - Linda. I'm so excited to share with you a project using Globecraft Memories and Xyron. This hop is doubly-delicious for me because I am a member of both teams and just love their products so much!

If you haven't heard, my daughter, Rachel, became engaged this week while on a cruise with her boyfriend, Kyle, in Alaska. It was a surprise to her and we're so thrilled about it! You can see the proposal here: https://www.youtube.com/watch?feature=player_embedded&v=DarqARYy09E. In honor of their day I made a little keepsake remembrance from an Altoid tin that's been sitting around in my studio forever!


The tin is sprayed with gold paint (probably five years ago!) to start. I grabbed some pretty papers from my scrap bin (sorry, I don't know the company); knew I saved them for a reason. Scraps are the perfect size for working with these little tins. I traced the tin to make a template and cut the paper to fit. I gathered all my products I wanted to use and spread them on my desk. All the edges are inked with Walnut Stain Distress Ink. I distressed the edges on a few here and there with an edge distresser. The cute paper cut outs are from Crafty Secrets Altered Fairies and Vintage Photos. The Piccolo set used here is Card Decor Set #1.

After all the pieces were inked I dipped the Piccolo pieces into clear embossing powder and heat set. I love the natural, raw look of the Piccolo so tend to use these unpainted, but the inked edges and clear embossing powder really make them POP on a project.
The papers get run through my Xyron 2.5 Create-a-Sticker - perfect size for Altoid tin paper and it really, really sticks nicely.
I love my corrugated cardboard hearts - they've nearly become a go-to embellishment for me. And with the new Fairy Wings from Globecraft - well, they look super cute! I inked the wings a little and clear embossed them as well. Then I like to sprinkle on just a pinch of our Pure Gold Glitter; reheat slightly so the glitter gets embedded in the embossing enamel. Look how cool and sparkly! I added a brushing of Glossy Glastique to the finished wings to help protect them and to make them more durable.
I wanted to add some texture to the Altoid tin so used our Vintage Copper enamel powder on the edges. It really added the texture I was looking for.
After that I just played with all my pretty bits until it felt right. I'm in love! I even decided to add a teeny-tiny calendar with the date circled in the mix. I couldn't be happier with the way it turned out. That little piece of sheet music on the front is in honor of Kyle who is a singer and songwriter.


I think I'll be making a few more of these in different themes! How about you?
Stop on over to my blog to see another Globecraft Memories and Xyron combination project!


And, what's a hop without a giveaway??!! 


Use the Rafflecopter widget below to enter to win a Piccolo Prize Pack filled with your choice of any 4 packs of Piccolos!! Be sure to "like" and "follow" our friends at Xyron too!