Thursday, March 28, 2013

Gearing up for something rusty


I love the look of rust. Something about its rich, aged look really appeals to me. It should be no surprise then that I am in love with the new Real Rust Embossing Powder from G&P. This stuff looks like the real deal folks! I used some to create a steampunk/vintage pendant that I can't wait to wear!  


Rebecca Price
Distress to Impress!

Supplies:

I began by coating a G&P Gear Charm with G&P Mars Black 3D Enamel Gel, and setting it aside to begin drying.


Then I prepared the key charm and gear shapes for heat embossing by coating them with G&P Enamel Powder Adhesive. This is an essential for any embossing fans. Application is so easy!


The next step was applying the G&P Real Rust Enamel Powder. Like all of G&P's other  powders, you need to shake the jar very well before using. There are several different materials inside the powders that mix to make amazing results! I used my heat gun to set the pieces.


Once they  were cool, I placed them onto the gear charm by just gently pressing them into the 3D Enamel Gel. Since it wasn't completely dry, the gel acted as an adhesive. I used G&P Glastique to adhere anything that wouldn't stick.


The final step was covering  the entire piece with G&P Glastique and setting it aside to dry. This process does take time, around 7-8 hours, but the end result is a beautiful glossy pendant!


To see another great G&P Real Rust Enamel Powder project, head over to my blog Distress to Impress!


Wednesday, March 27, 2013

Sharing the uncoventional

Arin Flynn
A Piece of Life's Pie
Hello, it is Arin again and I am pulling away from my little oasis I call my craft room to share with you a couple of ways you can use Globecraft & Piccolo's Embossing Powders that are not your average conventional ways you would use them.

First you can upgrade a plain MDF craft letter to having a rustic full metal jacket look by applying Piccolo Embossing Powder Adhesive in a dabber bottle and then dusting it with Piccolo Vintage Silver Embossing Powder, shaking off the excess and setting it with a heat gun.   


This next idea came to me as I was crunched for time and needed to add a little bling to my home-crafted felt roses. I did not have time to wait for glue and glitter to set and dry and I thought about applying some embossing powder to it. It worked!

All I did was take a small Q-tip like brush and dip it into the Piccolo Embossing Powder Adhesive and applied it to various areas around the felt rose. I then dusted those areas with Piccolo Siam Silver Embossing Powder and brushed off the excess and slowly heated the area with a heat gun (take care in this step to not get the felt too hot, or it will melt).  


As you can see, Piccolo Embossing Powders not only add a level of elegance and beauty to a project, they can also act as a great staple in any crafter's supply stash.

Check your local scrapbook or stamp store for our Piccolo products or click the link below to shop if you can't find them locally. Be sure to share your Globecraft & Piccolo product projects with us on the Globecraft & Piccolo Facebook Page!

Tuesday, March 26, 2013

Globecraft & Piccolo Design Team Call!

This is your opportunity to showcase your talents using our Piccolo products that include Embossing Powders, 3D Enamels, Instant UV Resin and more! We’re looking for crafters to showcase our products in wearable art forms, mixed-media, altered art, card making, home décor and other art forms.

Requirements
•    Must have good photography skills – clear and sharp photos
•    Must have a firm sense of responsibility to ensure posts are ready on time and with concise, step-by-step tutorials (3 projects per month)
•    Must be supportive of our team members and company
•    Must be able to link tutorials to your blog and other social media
•    Must participate actively in our albums, Pinterest, Facebook and other media avenues

Email us at GlobecraftDesignTeamCall@gmail.com. Put ‘G&P Design Team audition’ in the ‘subject’ line and include the following:

•    First and last name, city & state.
•    Add a link to your blog, online gallery and/or video’s
•    Attach three samples of your latest projects 
•    Tell us how many, and which other design teams you currently serve on (previous design team experience is not required)
•    Include a bio and mug and tell us why you would like to join our team
•    Tell us if you currently teach classes online or in stores

Deadline to Apply is April 30, 2013; members announced May 5, 2013

The selected G&P Team begins June 1, 2013 and runs through December, 2013

Creating a Globecraft Rosary


For many years now, I have created and given rosaries to my family members for special occasions like First Communions or Confirmations. The organization of the beads on a rosary represents different types of prayers. If you want to learn more about praying a rosary, this site seems to be a pretty good resource.

This rosary takes a few liberties in the construction, but would be perfect for kids to use or even to create in a  religious education class. Although it is very large, it is really inexpensive and a lot of fun to create. Here is how:

Materials:

Directions:
1)  Paint the beads white. It helps to put them on a skewer to hold them. You can set them on the jar to dry and toss them in when they are done.


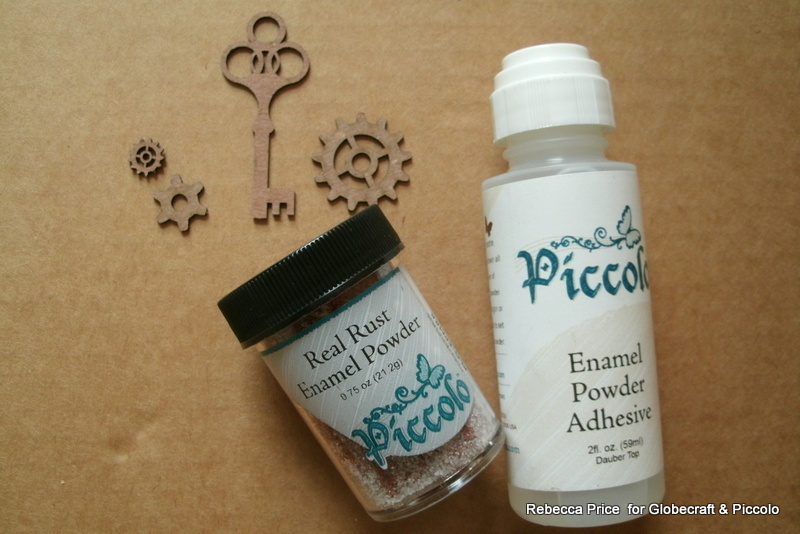
2)  Open the Globecraft Embossing Powder Adhesive and dip the small brush in. Use to paint a design on the wooden beads. Don't forget the top and bottom.


3)  Pour the Vintage Silver Embossing Powder over the top of the bead.


4)  Heat set. Don't get too close while you do this (like I tend to) or you will experience bubbling in the melted embossing powder. If is happens, back the heat off a little and wait until the bubbling is over before you turn off the heat gun. Let cool.


5)  Place five beads on a skewer with a little masking tape between them. This will make it easier to paint with the gels.


6)  Squirt some enamel on a craft sheet. Use this as your palette for painting. I started with the darker of the two turquoise colors and then, in order, the lighter turquoise, dark blue, green and white. I used the fine paint brush, did all 5 beads at once, and blended a little with the brush. Set over jar to let dry.


7)  When beads are dry, make a circle of Glastique around the diameter of a bead. Brush over the whole bead with a medium sized paint brush. Repeat for all the beads. Let dry completely.


8)  Dab on Piccolo Embossing Powder Adhesive with the dabber top and sprinkle with Vintage Silver Embossing Powder. Heat set with the heat too. Use one coat on the back and two on the front of each piece. Hold upright with tweezers while heating.

9)  Adhere the rhinestone to the center of the cross.

10) Use Piccolo Instant UV Resin on the back of the heart and the cross. Use a toothpick or paintbrush to spread it.


11)  Cure by placing in sunlight or using a manicurist's UV light.

12)  Repeat on the front of the cross and heart.

13)  To build the rosary, make a knot about 1 1/2" up from the end of the silk cord. Slip a bead on and push it all the way down onto the knot. Tie a knot that butts up to the other side of the bead. Tie a second knot, place another bead and tie off. Repeat in a pattern all the way around. Make 10 beads close together, then a single one 1 1/2" away, and then another 10 close together, etc. The pattern is 10 close, one separate, 10 close, one separate, 10 close, one separate, 10 close, one separate, 10 close. Then, leave another 1 1/2" and cut. Tie both cut ends to the top of the heart. Tie part of the rest of the strand to the bottom of the heart. Leave 1 1/2" and tie in another bead. Leave 1 1/2" and start a unit of 3 close beads. Another 1 1/2" and a separate bead. A final 1 1/2" and the cross. It is easier than it sounds.

This is what the close together beads look like.


Here is what the heart attachment looks like.


This is what the whole arrangement looks like.


I hope you enjoyed this tutorial. You certainly don't have to make a rosary to make and use these Faux Glass Beads or to create a cross or heart that you can use in jewelry making.

Thank you for checking out my post today. Stop by and visit my blog at www.rememberinglifesmoments.blogspot.com. Thanks again!


Saturday, March 23, 2013

A hands-on approach to Enamel Gel

Laura Drahozal
Remembering Life's Moments
Hi! Laura here and I want you to know I just adore the new G&P 3D Enamel Gels! One of my favorite ways to use them is to apply enamels to a textured surface with my fingers. The Globecraft bookboard is a perfect surface. 

First, I apply paint to create light reflection and enhance the transparency of the enamels. White and metallic colors work best for this. Then, I create texture using an embossing folder. To add the color, I simply squeeze the enamel directly onto the project and smear it with my finger.


I suppose I could smear it with a paint brush, but I prefer to actually touch my project. When it is textured, the color goes into all of the nooks and crannies. Because I am rubbing over the top of the raised areas, it leaves just a light, transparent film in those spots.
This is what it looks like done:


Another benefit is the ability to mix colors with my fingers. I just place all the colors where I want them and then blend lightly with my finger.


And the results?


Give the hands-on approach a try! You won't be disappointed. 

Blending 3D Enamels


Hey, it is Laura today. You may have already guessed, but I just LOVE the Piccolo 3D Enamel Gels. I have been collecting the wide range of colors. One of the features of these wonderful gels is their ability to stay where you put them. But what do you do if you want a little bit of blending between the colors? Use a toothpick, like I did here.


Just move the color from one section into the other with the toothpick. You can blend it as gradually or as specifically as you want. Here, I am blending it to create streaks going from one color into the next.
The finished look? Here it is:


It was all part of the frame that you see here.


I hope this tip has helped you figure out new ways to use your enamels.


Thursday, March 21, 2013

Making classic cards for Easter


Hello! Tracy here with a floral Easter card tutorial!

When I was young my mother would always encourage my brother and I to do something artistic as gifts for the holidays. We would collect papers, catalogs and ribbons for cards and paper ornaments, trying to match each gift to the person we were giving it to. While the years have passed and our lives grown more hectic I still love to make cards for the holidays. So when my mother asked me if once again I would help with making cards for Easter I was more than happy to. Here is one of the classic themed cards I made.


Tracy Alden
Art Resurrected
Supplies:
Carefully remove the Piccolos from the chipboard frame. Remove the large cross and frame. Save the two small crosses for future projects. Apply Piccolo Enamel Adhesive to the cross and frame pieces. Coat the cross with 24K Gold Embossing Powder and the frame with Shamrock Dreams Embossing Powder; heat to set.


Carefully cut the linen print card stock to fit on the front of the card. Cut the green card stock to fit the frame coated in enamel powder.


Taking the brown and green dye ink pads, rub them on the linen and green card stock lightly on the edges.


Adhere the frame to the green card stock with Glastique Matte Finishing Glaze, then adhere to the linen card stock.


Adhere the cross to the middle of the frame with Glastique Matte. If you notice the cross curling upward just place a heavy book on top of the card to dry flat.


Apply the green sticker gems to the cross with Glastique Matte and let dry.


Apply Glastique Matte to the top left and lower right corners of the frame and place the paper flowers on top.


Stamp or write your favorite Easter sentiment inside. :)

Jump on over to my blog Art Resurrected for an Inspire Art pin tutorial!


Until next time, safe travels!