Friday, January 17, 2014

Warm Winter Wishes!


When I got my Design Team goodies from Globecraft & Piccolo the very first thing I noticed that one of the embossing enamels, called Mardi Gras, looked like it matched one of the designer cardstocks I had recently used on some holiday cards.  Funny how that happens!  The colors of the Enamels are breathtaking!! After I thoroughly pawed through my goodies (and set aside some items that were a bit too cold to use – the 3D Enamel Gels were almost frozen solid!) I pulled out a scrap piece of the Basic Grey cardstock called Figaro.  Sure enough, even under my Ott light, the enamel looked to be a complimentary color.  And although the holidays are over, winter certainly isn’t, and that is what prompted this card.

Here is the finished card.  I love the colors!!
 What I used to make the card:
First thing I did was stamp the “Warm Winter Wishes” stamp on some white cardstock using the Enamel Powder Adhesive Fluid. I was a bit skeptical about this delivery system but I found it much easier to use than an embossing ink pad & it delivers the perfect amount of embossing ink – just don’t squeeze the bottle!  I sprinkled the Mardi Gras Embossing Enamel onto the sentiment and heated until it was embossed.  The Embossing Enamel is a fairly thick powder and I wanted to ensure that it was able to catch the beautiful calligraphy that Quietfire stamps are known for.  I think it came out perfect.  Then I stamped the Small Snow Pine stamp, using the Jet Black ink, on another piece of white cardstock and added some color to the tree with Distress Markers in Frayed Burlap & Forest Moss.  I wanted to emboss on the tree only where the snow would be, so I used a small paint brush and painted the embossing ink onto the areas of the tree where I wanted the enamel to stick. Once that was done, I poured the Mardi Gras Embossing Enamel onto the tree, tapped off the excess and embossed.  I cut the tree out kind of loosely – I don’t think I would have been able to fussy cut this image – and attached it to the Basic Grey paper.  Then I adhered my sentiment and finally, all that went onto the card base.  It’s difficult to get a good picture of how the colors match due to the shininess of the Enamel, but I hope you can see how well this card coordinates.

Here is a close up of that luscious Mardi Gras Embossing Enamel
Look for more wintry posts in the coming weeks!

Thank you & I'll see you soon - I have a bunch of different creations cooking right now :)  Christi

Happiness is a room full of Art Supplies

Aimee here!
I hope you've all had a wonderful week!
I've been busy in the crafty studio making all kinds of things.
 
Up for you today, I have another mini canvas. This one is ATC sized (2.5x3.5").
This is another project that sounds way more complicated than what it really is.
Hope ya like it!


What you need:
ATC canvas (I buy mine at Hobby Lobby)
Paint (I used Rustoleum Metallics, Luminous Pear)
Tiny Hole-less beads
Old book paper
Mod Podge
Heat gun
Rubber stamp (the one used here is a washi tape stamp from Viva Las Vegastamps!)
Staz On ink (black)
Bling
Epoxy sticker with saying or quote
Scrap of card stock or patterned paper
Heavy duty adhesive (I used Beacon 527 glue)
Piccolo shapes-  Daisy Floral Accents & Frame
 
What to do:
1. Put a light cot of paint on the canvas (I just smeared it on with my finger). Let dry, or dry with heat tool.
 
2. Use the Mod Podge to adhere old book paper to the canvas. Use the heat tool and dry it about half way, then rip some of the paper off. let dry the rest of the way and smear a little more paint over the paper. Let dry.
 
3. Stamp in the upper left corner of the canvas.
 
4. Once everything is dry, it's time to get funky and add the enamel powders! Woohoo!! Open up the enamel adhesive and slap some on that canvas. Add metallic Copper powder, shake off the excess, and heat that baby up. Continue on with the other colors. Once the final color is on and melted, drop some tiny hole-less beads on it. Allow to cool thoroughly and then shake the loose beads off.
 
5. Now put your epoxy sticker onto the scrap of paper, trim around it, and set it aside.
 
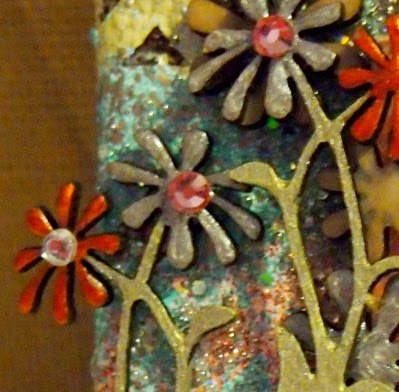
6. Get your cute lil' flowers out and paint the stems & leaves. Now, coat each flower with the enamel gels and let them dry. Once dry, add bling centers.
 
7. Put your paper-backed epoxy sticker onto the canvas using heavy duty glue. Flip it over and slap a heavy book on it for awhile, to be sure that it really sticks.
 
8. Using a toothpick or something similar, put glue onto the backs of your flowers and arrange them on the canvas. Place that heavy book on top of it for a few minutes to stick those cuties down good.
 
9. Now, take the silver metallic enamel gel and go around your epoxy sticker's edges. While it's still wet, pour the tiny hole-less beads over the enamel gel. Let sit a few hours or overnight, and then shake off the excess beads.


Thursday, January 16, 2014

Starry Starry Night


Hello there again ---- It Teresa - and I'm back with a new item to talk about this week. 

It's a constellation pendant.


I read lots of blogs and decor reports and noticed a trend for constellation items --- these can be for your zodiac symbol if you like, but in my case I chose my constellation for sentimental reasons. The very first one I was able to identify (and still the easiest for me to spot) was Orion.

So let's gather our supplies
- a teardrop acrylic bezel
- vintage black embossing powder
- embossing powder adhesive 
- glastique gloss glaze
- fine applicator tip 
- pointed tweezers
- interchangeable bails 
- a silk necklace cord

you will also need a
- heatgun
- tiny flat back rhinestones
- a fine point permanent marker (I used a sharpie)

 There are a lot of pictures - but this is really easy to do.


I printed a picture of the constellation I wanted to use and then shrunk it to fit the bezel size on my copier.


Gathered my supplies. (I pulled out Matte Glastique first but ended up using the gloss)


The Acrylic Bezels come with this blue protective coating on each side that peels off before use. You can see through it. So I simply placed my bezel with the blue coating over my picture and marked the constellation points with the Sharpie. Then carefully peeled off both sides of the coating.  Keep this marked piece.


Pounce on the adhesive all over the front of the bezel and cover with the Vintage Black Embossing powder. The Vintage Black Powder is a gorgeous Black, Gold, and Silver mixture.

Things to remember here  ----- do NOT squeeze the adhesive bottle, a simple pouncing motion is perfect and ALWAYS roll the powder jar to mix the colors before you sprinkle your powder.


I used two coats of the powder and adhesive and learned that you can move the pattern around a bit with the air flow of the heat gun if you are going for a smooth finish like I was.

The longer you heat the powder the more smooth the finish is. A quick set leaves lots of texture. 

If you look closely at the picture above (the arrow), you will see two little place that the powder did not cover. Here's the fix.

I took a cotton swab and dabbed more adhesive in the thin area and than used my tweezers to pick up small amounts of the powder to fill just those areas.  (sorry - this picture is a little blown out, but I tried and tried to get a better exposure and being that close, it just didn;t happen) Reheat and ----


Here you have a really pretty representation of the night sky.  I did use my heat gun to "push" the powder around to get those two darker areas.


Take that marked piece of the protective coating and align it with the now covered bezel. (Be sure your orientation of the constellation is correct) Using something sharp (I used the point of the tweezers), press the star pattern into the enamel. The enamel is soft enough to take this pointed pressing and you will be able to feel/see the little indented areas for the next step.


Using the fine point applicator, dot the Glastique on those marked places and add your rhinestone "stars"

If you look closely (again see the arrow), you can spot the little indented places for the stars.

Let this dry -


After the stars dry, coat the entire front with more of the glastique. Let this dry completely.

Another tip ---- I have a cat who loves to help and can be a disaster for drying finishes. I grabbed a small clear bowl from the kitchen and cover my shape with that while it dries.


I added the pendant bail and a hung mine on a black silk necklace.

I love the Globecraft and Piccolo bails - they are interchangeable so you can switch your pendants as often as your mood changes.

I would love to see your versions of the Constellation pendant.

You can leave comments here or also on the Globecraft and Piccolo Facebook Page.

I'll see you next Thursday, but please visit everyday. There are lots of inspiring projects here.

Have a great day.

Life is Beautiful

Teresa (aka MaggieGraceCreates)


Wednesday, January 15, 2014

One Little Word Magnets

  Happy Wednesday everyone! leslierahye here with a magnet project! As part of my goal setting for the year, I am a fan of living Ali Edwards' "one little word." This year my word is THRIVE and I've created a little art piece to put on my file cabinet near my workspace to remind me each day! I used the frame of the Daisy Floral Accents & Frame set to create my mini framed piece--final dimensions are about 2¾×3¾".


As I am still collecting enamel gels for my stash, I do not have every color yet and so I misted my daisy pieces with white Dylusions spray mist to give a matte black finish to the chipboard pieces. I Then covered the daisy heads in Glastique Gloss and set aside to dry. The stems and accent pieces were coated with the Leafy Green enamel.

On the frame I applied a mixed layer of Royal Sterling and Enchanted Aubergine powders to the chipboard prepped with  Enamel Powder Adhesive Fluid and heat set. Next I reapplied the Adhesive Fluid and mixed in some aged white and Aubergine and heat set. For the background, I cut a piece of cardboard to match the frame and built up two layers of Mermaid Tears EP and while my enamel was still hot, I stamped a text script stamp--prepped with Adhesive Fluid--into the enamel to leave an imprint. I used Glastique to adhere the frame to the background and coated the frame with Matte Glastique.

Once my accents were dry I layered a few on my frame using Glastique as adhesive. I added them to my frame and background. Canvas stickers spelled out the word THRIVE and a touch of Glastique helped to hold them into place. I added a magnet to the back with some E6000 for extra sturdiness. 

I hope you enjoyed my project! Thank you for stopping by today!

*****

Tuesday, January 14, 2014

He who has the key....

Hiya everyone, Tracy here sharing another of my projects. 

Now as Valentines day is creeping up I decided to spread a little bit of love and make a Vintage style Pendant using one of the awesome Acrylic Craft Charms
I am really happy how this turned out. Here is how I made it...

1. I made my own backing paper (It reads he who holds the key to my heart) and crumpled it up and then distressed it and rubber some gold wax around the edges, this was then glued onto the Bezel. 

2. I then took one of the hearts from Keys to my Heart Piccolo set and gave it two layers of Ruby Red Slippers Enamel Powder...The below picture shows just how beautiful this Enamel powder is. 


3. I also used one of the keys from Keys to my heart Piccolo Set and used Copper Kettle Enamel Powder...I only gave this one rough layer as I wanted it to have an old look to it


4. I then took Instant UV resin and put a fine layer down and placed the heart and key into it, I then left it on my window sil for a few mins to set, i then gave it another coat and again left on window sil to set....I love this product ! A definite must have, I wanted a old look to this whole thing so was very "rough" with how i applied the resin, I also wanted to create a look like you get with Amber and you have items floating and bubbles etc...I was very wary about doing it but I think it has work just how i pictured it would. 
This picture shows just how fab the shine is on the resin. I simply then added some vintage ribbon to finish it off. 

 Now between me and you I have seen there is some new items over on the website so make sure you check them out.
Also don't forget we have some brilliant inspiration from the rest of the team post regularly so make sure you keep checking back. 
Happy Crafting :) 

Monday, January 13, 2014

Altered Bottle Caps | Love Hang Ups

Happy Monday!

i love saying that...

I have a wall of love in my home and am always in need of a few more magnets. Even if you don't have kids and a plethora of 'Good Job!' papers to hang, you may still want to make these.


They're cute and useful.

Did I mention really cute?

G&P Shopping List:
Enamel & Embossing Powder Adhesive Fluid

Enamel Powders:
Temple Stone
Poodle Skirt

Clear Thick Enamel Powder

Tweezers

your favorite Piccolo Accents 

Other:
Heat Tool
Craft Mat
metal bottle caps (rinsed and dried)
scraps of paper, stickers, sequins, etc. (I cut words from some packaging.)


Notes: Take your time. Let the Diva of Perfection go...because sometimes the powder moves in it's own direction!

The metal cap will get HOT! Be sure to use tweezers and let the cap cool as necessary before you handle it!

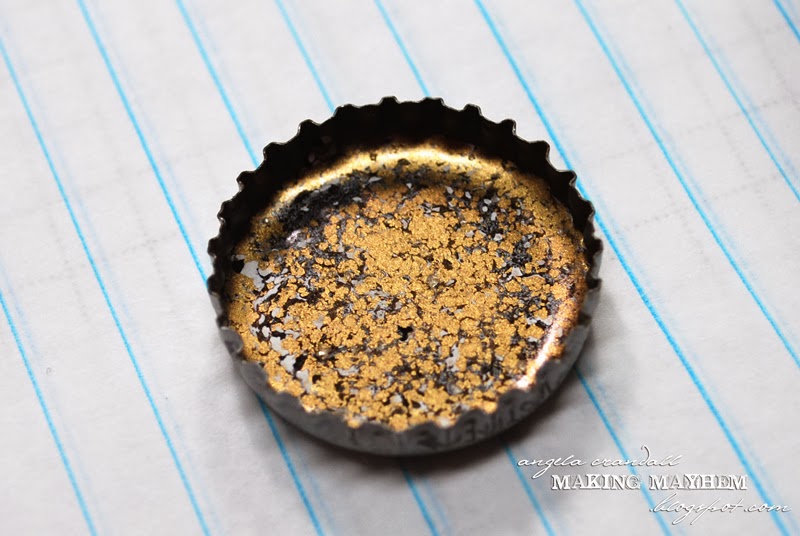
1.  Sprinkle a light layer of Stone Temple Enamel Powder into the bottle cap.

black, gray, white, gold

2.  Hold the bottle cap with the tweezers. Heating from underneath and about 5-6 inches away, slowly heat the bottle cap. Once the enamel starts to melt you can heat it from the top, starting 5-6 inches away until the powder no longer blows around.

3.  While still warm, add another layer of Stone Temple. Repeat Step 2.

4.  Repeat Steps 3 and 2 until you have the bottom of the cap covered.

 This is 3 layers.

5.  This time add a layer of the Clear Thick Enamel Powder. Repeat Step 2. Take your time. (It appears the Clear Thick Enamel Powder is heavier than the Stone Temple. It didn't mix as much as it moved the other powder. I LOVE this effect!) 
6.  Using the tweezers, hold the tiny heart. Using a paintbrush dab on the embossing fluid. Sprinkle the Poodle Skirt Enamel Powder on the heart and melt from underneath. Let cool before removing tweezers.

Look at the depth & detail of the Piccolo Enamel Powders (+ Clear Thick Enamel Powder)! Gorgeous!

7.  Repeat Step 5. While still warm begin to add your embellishments. Layering the Clear Thick Enamel Powder as you like.

Two layers.

Here you can see where the melted enamel moved across my sequin.
 Three layers. Done!

8.  Add your favorite kind of magnet to the back! Of course, you could also use this in another project, punch a hole to use it for a charm...I'm sure you'll think of something!

Last notes: I love that I didn't have to wait for stuff to dry, but you could use the Glastique or Instant UV Resin instead.  You can continue to layer more stuff into the cap whenever you want to. Added a tiny rhinestone to the 'empty' area in the top right of the cap.

Stop by the G&P store and check out the NEW ITEMS...I'm already working on a wishlist...

Well, that's it for today! See you here tomorrow with a fab project from Tracy!

Inky hugs,

Sunday, January 12, 2014

Froggy's Foliage Accents


One of this month's new releases is the Piccolo Froggy's Foliage Accents.  I love frogs, they were some of my best friends when I was a kid.  So I just had to make a pendant with this cute little guy.  I began with an Acrylic Teardrop and it's matching frame.  There are blue plastic protective sheets on both sides of the acrylic that need to be removed.  Just work at it with your fingernail and you can peel them off.  I embossed the frame with Gilded Rose Gold enamel powder and glued it down to the teardrop.  Using a mix of Kiwi and Luscious Lime Smooch Inks I colored the Foliage Accents and then glued them down on to the teardrop.


Next came a layer of Instant UV Resin, 3 minutes under a UV lamp or sunlight and it hardens to a beautiful glass like finish.  For my Froggy, I used Mossy Glen enamel powder, adding a bit of green cardstock behind his mouth and white behind his eyes.  I coated my frog with Glastique Gloss Finishing Glaze for a lovely shine.  The last step was to color the back of the acrylic with Light Blue 3D stamp paint.  Love the sparkle from this paint.   Be sure to stop by tomorrow for more inspiration from the team.