Monday, July 9, 2012

Enameled Charms

Hello, Allie here to share a little technique. It's kind of fun, and pretty easy, and there are NO mistakes - you just end up with a fun, distressed, enameled charm.

I started with Piccolo Chipboard Pieces and Piccolo Powders, and I also used Glasstique and Embossing Adhesive. These products are all extremely easy to use!


I decoupaged a pretty napkin to the charm. I used only the top layer.

Untitled
I adhered napkin to chipboard charm using glue stick.
I sanded away the excess with Basic Grey sanding tools.
Afterwards, I dabbed on Embossing Adhesive around edges, heat to set.
Then, I applied some Glasstique.
Untitled
Once I had a layer of Glasstique on, I pressed the chipboard piece, glaze side down, on my craft sheet (Ranger).
While it was upside down, I gently cleaned any overflow, or clogged openings.


Untitled 
I turned the charm back over and heat set the Glasstique with my embossing tool, until glaze begins to brown or bubble. (NOTE - do this step in a well ventilated area - there can be some odor from melting the adhesive).
I added a little more Piccolo powder and heat set afterwards, for a little more dimension and sparkle.

For a finishing touch, I went over any exposed chipboard with a Copic Marker. Please note that Copics and powders are not meant to be used together so I was just using it on the unembossed areas. 

Supplies

Piccolo Chipboard Pieces
Piccolo Powders
Glasstique
Embossing Adhesive
Napkin
Glue Stick (Glue Arts)

Tools

Heat Embossing Tool
Sanding Tools (Basic Grey)
Nonstick Craft Sheet
Copic Marker

Thanks for stopping by today. Have you tried anything fun with your powders? I'd love to hear about it.


Sunday, July 8, 2012

3 Wise Men - Creating a Shadowbox Effect

Did you know that you can apply enamel or paint to the inside of a globeframe to make the back like a shadowbox?! Its true!


On this ornament, the back was painted versus enameled.  Look for this and more ornaments in our upcoming CHA release, next week!!

Saturday, July 7, 2012

Christmas in July

Hi all!  Ryann here with a holiday treat for you today!  Globecraft Memories is gearing up behind the scenes for a big Summer CHA in just a few more days.  I thought it would be fun to show you a little sneak peak of what's to come...

I don't know about you, but in my world, it's never too early to start thinking about Christmas gifts.  I try to do my holiday shopping all year long so it's not a big rush at the end of the year when the majority of my town is searching for the perfect presents for their loved ones.  One of my favorite things about being a crafter is it has opened up a whole new arena of gift-giving.  Not only can I buy gifts, but I can make them too!  This ornament would be a great gift for your friends, co-workers or family.


Supplies used:

  • Glastique (Globecraft Memories)
  • Enamel Powder Adhesive (Globecraft Memories)
  • Mossy Glen Enamel Powder (Globecraft Memories)
  • Brown Stone Enamel Powder (Globecraft Memories)
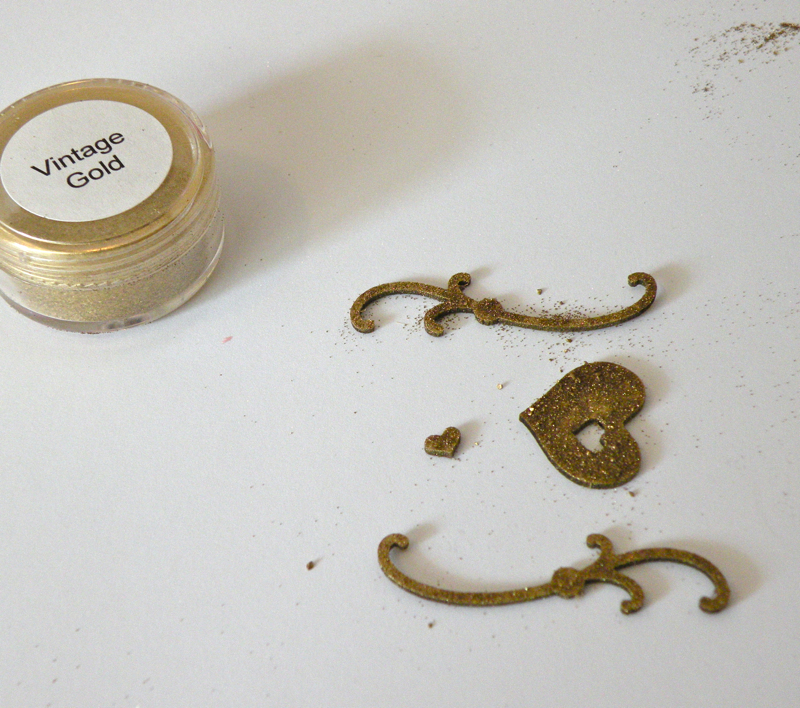
  • Vintage Gold Enamel Powder - coming soon! (Globecraft Memories)
  • Fine White Enamel Powder - coming soon! (Globecraft Memories)
  • Christmas Tree Ornament - coming soon!  (Globecraft Memories)
  • ribbon
  • jute twine
  • cardstock
  • stamp
  • ink
  • rhinestones
Thanks for joining me today for some early holiday gift giving ideas.  Be sure to come back tomorrow for more inspiration using some of your favorite Globecraft Memories products! 


Friday, July 6, 2012

Wonderland Victorian Wand By Lisa Kettell

Wonderland Wand Project!
"It was at the great concert given by the Queen of Hearts, and I had to sing:"Twinkle, twinkle, little bat! How I wonder what you're at!" You know the song, perhaps?' `I've heard something like it,' said Alice. `It goes on, you know,' the Hatter continued, `in this way: "Up above the world you fly, Like a tea-tray in the sky. Twinkle, twinkle--"'-Mad Tea Party

Globecraft DT: Wonderland Wand 4 
  There is nothing more exciting to me then re-visiting favorite childhood stories and adventures, one of those is the story of Alice in Wonderland. When I was first born my Aunt Noel, gifted me with a red leather hard bound copy of Alice in Wonderland, she took one look at me as a newborn and declared this would be my favorite story, she was more then right, I'm obsessed with it, lol.

Everything I dream up is inspired by a fairytale or story, this project was inspired by the Victorian Age when Alice in Wonderland was written, its odd characters, tea time and a game of Croquet in the Garden, the result a double sided vignette wand with each side capturing a page out of Alice in Wonderland through the use of Globecrafts clear frame bubbles, piccolo's, charms, powders and finishing glazes.

Globecraft DT: Wonderland Wand 7Globecraft DT: Wonderland Wand 6

Materials
-2 Little Fancy Rectangle Bubble Frame's
-Piccolo's: Card Decor Set # 4
-Piccolo's: Card Decor Set #11
-Piccolo's: Key Charm Set
-Powders: Mermaid Tears, 24K Gold

-Glitters: Pure Sparkle Gold
-Glastique Gloss Finishing Glaze
-Glue: Hot Glue, Acid Free Glue Stick

-Mixed Media Inks, Emboss/Pigment Inks: Clear, Gold, Frost Smooches, Clearsnap 
-Acrylic Paints: Red, White, Aqua, Green
-Chipboard
-Scrapbook Papers: Robins Nest, Trinity Papers and Lisa Kettell Designs
-Collage Images: Storybook Collage CD, Lisa Kettell Designs
-Wooden Dowel
-3 Small 1/2 inch wood block or spool
-Ribbon, Pom Pom Trim
-Bakery Twine, Hemptique
-Tools: Scissors, Glue Gun, Paint Brushes, Heat Gun
-Other: Floral Excelsior Moss, 3D Embellishments, Dresden Trims, Ephemera/Coin Wrappers, Paper Rosettes, Tiny Bottles

Globecraft DT: Wonderland Wand 8

Globecraft DT: Wonderland Wand

The Queen of Hearts Side Directions

1.  Re-size and print wonderland style images of from collage cd, cut, glue to chipboard with glue stick and cut out again. This will give durability to the image, set aside

2. Open one package of the Little Fancy Rectangle Bubble Frame's, paint the 2 bottom frames with red and white acrylic paint in a striped pattern, next using an clear emboss ink pad coat the top thin frame in the Little Fancy Rectangle Bubble Frame pack, sprinkle 24K gold emboss powder on it, shake off excess and heat set.

3. Layer the inside of the bottom base frame with vintage images, ephemera, moss, next attach 2 small 1/2 inch wood blocks to the back of the cutout chipboard image of Alice using hot glue, then attach to the center of the bottom base frame. ( See project pictures)

4. Add a red paper crown to Alice's head, coat with glastique finishing gloss glaze for an enamel shiny look. Decorate Alice with a key charm, embellishments and bakery twine. Finish off the images with mixed media inks and frost smooches.

5. Attach the clear plastic bubble, followed by the rest of the frames, glue in place. 

6. Next hot glue a wooden dowel to the back of the finished framed piece, set aside.


Globecraft DT: Wonderland Wand 17Globecraft DT: Wonderland Wand 13
Mad Hatter Side Directions

1.  Re-size and print wonderland style images of from collage cd, cut, glue to chipboard with glue stick and cut out again. This will give durability to the image, set aside

2. Open the next package of the Little Fancy Rectangle Bubble Frame's, paint all the frames with a mix of green and aqua acrylic paints, accent with gold color ink pad.

3. Layer the inside of the bottom base frame with vintage images, ephemera, tiny playing cards, next attach 1 small 1/2 inch wood blocks to the back of the cutout chipboard image of the mad hatter using hot glue, then attach to the center of the bottom base frame. ( See project pictures)

4. Paper pleat a coin wrapper and attach to the mad hatter images. Finish off the images with mixed media inks and frost smooches.

5. Attach the clear plastic bubble, followed by the rest of the frames, glue in place. 

6. Next hot glue the 2 finished frames together.
Globecraft DT: Wonderland Wand 10Globecraft DT: Wonderland Wand 9

Final Directions

1. Decorate your entire wand with piccolo's and accents. I used the key and key holder parts from the piccolo card decor set 4, I embossed them with a mix of 24K and mermaid tears embossing powders, then coated with glastique gloss finishing glaze. I then inserted the key into the key holder for a 3D dimensional effect.

2. I paper pleated scraps of paper, attached end with glue, pushed edges in to form rosettes, then hot glued all over the wand.

3. I added mini flag banners to the wand using scrapbook paper, inks and bakery twine.

4. Next I inserted pearl topped push pins into parts of the wand, more piccolo's, Dresden trims and embellishments.

5. Now comes the fun part, adding the glitter. I used pure sparkle gold glitter all over the wand, using glastique gloss finishing glaze, after it dried, I wrapped the ribbon up the wooden dowel and tied 2 bows at wand center.

This is such a fun project, the possibilities are endless.
Globecraft DT: Wonderland Wand 11Globecraft DT: Wonderland Wand 16

Tips/Tricks
-Use Wonderland stamps and stamped images in place of collage images
-Take images of your loved ones and use in place of the collage images
-Mix and match the bubble frame kits and sizes.
-Turn the wand into an ornament or use 4  to 5 of the smaller kits and create a banner.
-Try mixing your embossing powders for more fun effects.
-Use all piccolo's in place of the images.
Globecraft DT: Wonderland Wand 15

I hope my project has inspired you to create a fun wand of your own!
xoxo
Lisa


Thursday, July 5, 2012

A Charming Little Tag

Hey there everyone, Stacy here today.  I LOVE to create tags since there are so many uses for them.  Place them on a card, tie them on a gift bag, or simply place an easel on the back and disply them.  That being said I always like to tie ribbon through the top and add some sort of embellishment to the ribbon.  The super cute Piccolo embellishments are perfect for this.  With so many embellishments to pick from you will for sure find just the right charm for your tag.

Here is the latest tag that I created.  I knew when I saw this sentiment that the butterflies would be perfect.  I went with inking these and love the way that the ink takes to the chipboard. 


I used jump rings through the butterflies to hang them together and attach them to the safety pin. 


GlobeCraft Memories Supplies:
- Butterfly Charms

Non GlobeCraft Memories Supplies:
- Ranger distress inks
- Ranger manilla tag size #8
- Idea-ology safety pin & jump rings
- Wendy Vecchi Stamps
- Dylusions Stamps

Thanks so much for stopping by today.  Next time you need some super cute embellishments to hang off of your tags and even tie onto the side of a mini album give these a shot!


Wednesday, July 4, 2012

Piccolo- Not Just For Cards!

Good morning Globecraft friends,

Pinky here with a post today all about summer baking.
I know in this heat you don't think a bout baking, but something about
all the fresh fruits and vegetables always gets me in the mood to bake the day away. 


You know the amazing Piccolo products are not just for cards, they make
amazing embellishments for layout, banners, books, anything you can think of!
I wanted to share with you how I used this Card Decor Set #8 to create this
vintage style baking layout. 
 Step 1. Carefully remove Piccolo chipboard pieces you want to create with.
Step 2. coat each piece with Piccolo Enamel Powder Adhesive.
 Step 3. Carefully coat each piece with Piccolo Enamel Powder. 
 Step 4. Using heat gun, set Piccolo Enamel Powder. 
 *Optional* Step 5. After setting Enamel Powder you can leave as is or 
coat thoroughly using Glastique. 
 Step 6. Trim out photos and matte.
 Step 7. Adhere matted photos to layout.
Step 8. Embellish! Adhere enameled Piccolo chipboard to layout as shown.
The Piccolo chipboard adds an amazing touch you won't find
just anywhere, it adds that amazing intricate touch that makes your layout pop.
What can you use Piccolo on today?
Until next time-

Products Used:
Bo Bunny Paper
American Craft Thickers
Beacon 3N1 

Monday, July 2, 2012

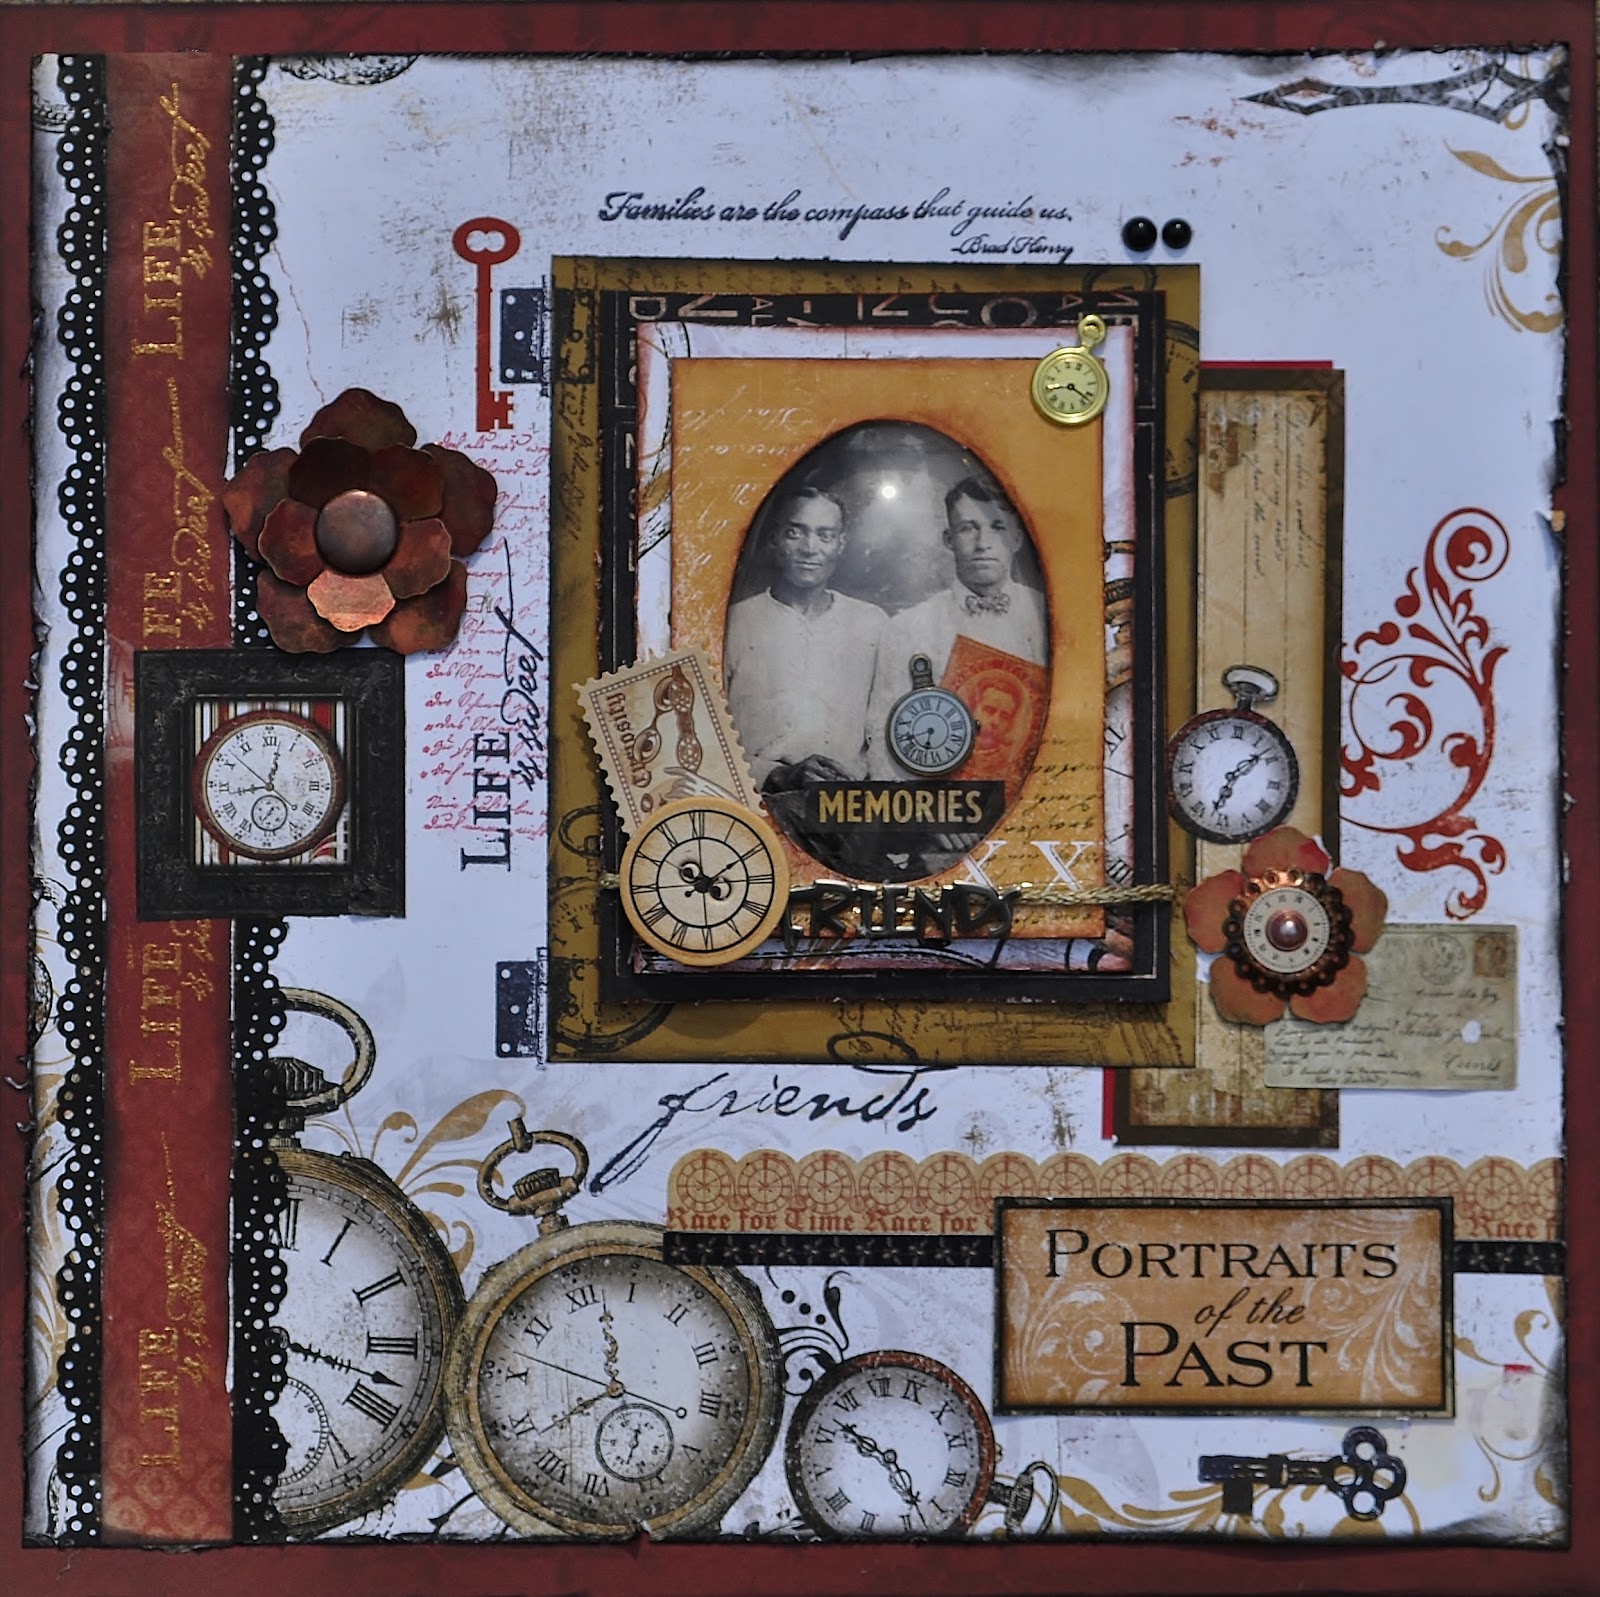
Portraits of the Past

Hello, Charlotte here, today and I am sharing how to create a frame using the GlobeCraft Memories 3-Dimensional Traditional Retangle Ornament. Once I created this frame, I added the frame to a Scrapbook Layout. Love the globe on this frame...so perfect for vintage pages.
                                  

                                                                 Detail of the frame.

GlobeCraft Memories Products
GlobeCraft Memories 3-Dimensional Traditional Retangle Ornament Frame
Piccolo Gilded Rose Metallic Enamel Powder
Piccolo Enamel Embossing Powder Adhesive

Other Products
Bo Bunny Timepiece Paper
Bo Bunny Serenity Paper
Graphics 45 Olde Curiosity Shoppe Collection
Close to My Heart Stamp
Graphic 45 - Staples Collection - Metal Flowers
Elmers Glue
ColorBox Mix'd Media Inx Leather

Here is the video I am sharing with you for creating the frame.....


Thanks for stopping by the GlobeCraft Memories Blog