Monday, May 7, 2012

Cranberry Wine Piccolo Thank You Card

Hi all!  Ryann Salamon here with a simple thank you card - easy enough for beginners to create and fun enough for the pro card makers out there!
After you remove the little flowers and flourishes from the chipboard frames they come in, make sure you save the negative pieces to use on a different project!  I painted the flourishes from the Piccolo Card Decor Set #7 and set them aside to dry.  I used the Embossing Powder Adhesive to adhere the Cranberry Wine Powder to the flower Piccolo pieces.  After heat setting with a heat gun, they are ready to go!

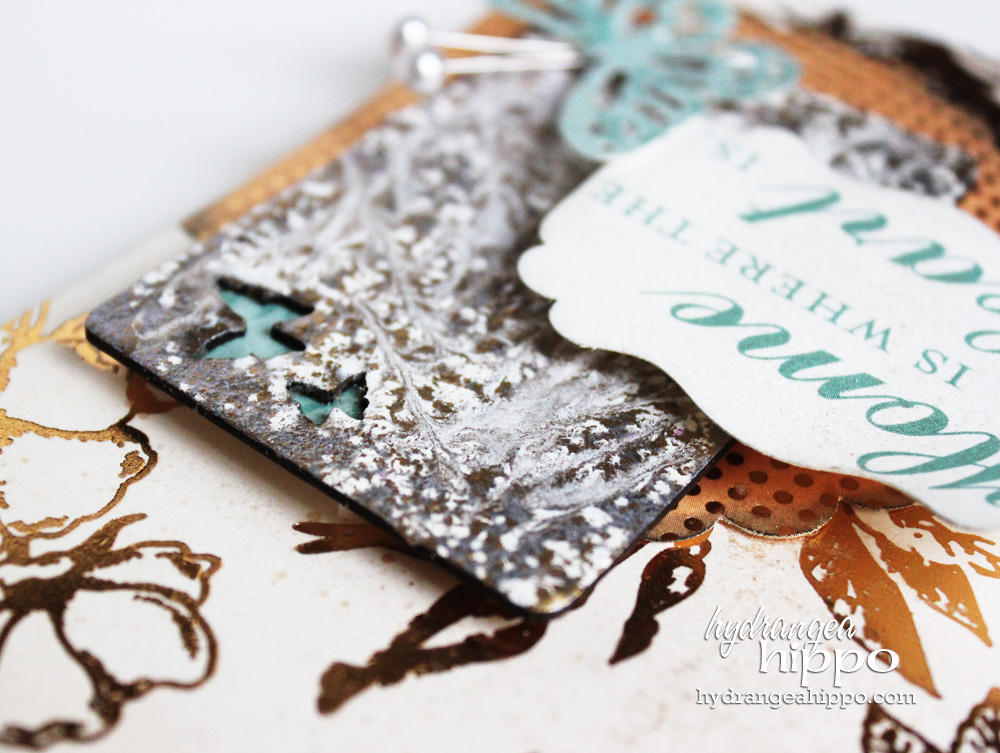
Here are a couple close-ups of the chipboard pieces using the Piccolo Card Decor set #7 and Cranberry Wine Powder.

Supplies used:


Posted by Ryann Salamon at ryannmarin.wordpress.com


Sunday, May 6, 2012

Scrapping with Card Decor?!

Just because it says "Card Decor" in the name, don't let Piccolo Card Decor fool you! It's all about scrapbooking this weekend so I thought I'd share a little layout I did with Piccolo Card Decor Set #11.


The banner style shapes from the Piccolo card Decor Sets work really well to frame a focal phot on a layout. Here I coated two of these pieces, all from Cad Decor Set #11, with Enamel Powders and ink and used them to anchor my photo on the page.


I then added some details such as adhesive pearls and used fine Enamel Powders on the detailed pieces of the Card Decor Set.


Here's the layout with 3 other projects I made using the single Card Decor Set #11 -- who knew the Card Decor Sets were so versatile!?


Supplies:

Posted by Jennifer Priest
hydrangeahippo.com

Saturday, May 5, 2012

Girls Just Wanna Have Fun!

Our new Piccolo Charms can be used for more than just jewelry - they can be used as decorations too! 


This necklace and wine decor set uses one of the new Piccolo Charm sets and our Siam Silver Powder and Cranberry Wine Powder. Isn't she divine?!

We'll be announcing all the new products on our blog soon!! 

Friday, May 4, 2012

A Sneak Peek at Piccolo Charms!!


Crystal Copperstone and Susan Helder visited us last week at the factory and

played around with some of our not-yet-released Piccolo Charms and our new
Piccolo Powders.  Fun was had by all!


Crystal will be with us at our booth at the Michigan International Woman's Expo in Novi Michigan May 3rd - 6th along with our brand new Piccolo Charms
(a few of which you can see in the pictures). Stop on by booth 111/113 and say hello!!

Thursday, May 3, 2012

A Peek at New Product Being Released at the Michigan Women's Expo


Candy Spiegel and Linda Neff came to the factory today to play around with some of our soon-to-be released Piccolos and made some gorgeous cards for the Woman's Expo in Detroit this  weekend.  

All the Piccolos are coated with our Enamel Powders of course. :)  Enjoy this little peek behind the scenes:


Stop by and see us in booths 111 and 113!! We'll be here from May 3-6, 2012.

Wednesday, May 2, 2012

Don't Blink

Don't Blink..... because time passes by so quickly.  I  wish I could press the rewind button so I could travel back in time to watch the lives of my ancestors.  This month, I created an easy project that rekindles the past and let's us treasure the days gone by with a mini hanger photo display.

Hi, Charlotte here sharing a wooden mini hanger that I turned into a vintage photo display using Piccolo Mixed Media and Metallic Colors Powder.


Supplies
GlobeCraftMemories Products

Other Products
Stampabilities Antique Key Stamp
ColorBox Leather Mix'd Media Inx
Tim Holtz Idea-ology Salvage Stickers Crowded Attic
Tim Holtz Idea-ology Advantus Cropper Hopper Philosophy Tags
Mod Podge
Blue Moon Butterfly Charm
7-Gypies Clips
ColorBox Wicked Black Archival Dye Ink Pad
Prima Avon Rose Collection Paper Flowers
Recollection Paper Flowers

Directions
  • Find a a mini wooden hanger.  A mini hanger can be purchased at a craft store.
  • Apply a coat of the Piccolo Embossing Powder Adhesive to the front and back of the hanger.
  • Immediately after applying the adhesive, sprinkle Piccolo Brownstone Mixed Media Embossing Powder over the entire surface of the hanger. If you are using a tidy tray, gently tap the corner of the box on the tray to remove all the excess embossing powder. A folded piece of paper works just a well. 
  • Using a heat gun, hold the heat gun approximately six inches from the hanger sweeping backward and forward until the embossing powder starts melting. Do not over heat the image with the heat gun, because the embossing powder will burn. 
  • As soon as the embossed powder is cool, randomly apply the Piccolo Adhesive on the hanger.  Sprinkle the hanger with Piccolo Victorian Bronze Metallic Powder and heat emboss the powder.
  • Make paper cutout images to place on the surface of the hanger.  For this project, I used torn pages from a vintage book, vintage stickers and vintage paper images.
  • Apply a small amount of glue or decoupage medium, such as Mod Podge, to the area of the prepared surface where you want to place the images.  Smooth out the glue with a small paintbrush.  Apply a small amount of the same glue to the back of the image, and smooth with a small paintbrush.  Place the cutout image on top of the freshly glued area.  Smooth out bubbles and wrinkles on the image using your thumb, being careful not to rip the image.  Apply the rest of the cutout images in the same manner.  The cutouts can be overlapped to suit your taste.  Apply three or four coats of decoupage medium to the finished surface after it has completely dried.  Allow the surface to dry between coats.  Apply a final coat of acrylic sealant after the glue has completely dried.
  • Ink the edges of the hangers with dye ink.  Inking the edges of the hanger will give the hanger a vintage look. 
  • Screw in three eyelet screws under the base edge of the hanger.
  • Stamp vintage images directly on the hanger's surface using black dye ink.
  • Using thin wire, thread several coordinating glass bead through the wire. Wrap the wire around the hanger.
  • Wrap the curved hook of the hanger with coordinating ribbon.  Adhere the two ends of the ribbon with a dab of glue.
  • Embellish the surface of the hanger with stamps, an assortment of paper flowers, metal tags, mini glass bottles and charms.
  • Mat a three 3x5" photos on coordinating double sided paper.
  • Hang a metal clip through each of the eyelet screws and clip one photo to each clip.


Detail

Detail

Finished Result

By Charlotte Jenkins, AKA Suepup

Tuesday, May 1, 2012

Marbled Effects with Enamel Powders

One of the things I love the most about Globecraft Memories' Enamel Powders are how long they remain liquid after heating! I stumbled upon a fun technique using the Embossing Powder Adhesive--allow it to pool on the Piccolo Card Decor, and then sprinkle with Enamel Powder. I used the Mermaid Tears powder here:


While the powder is still hot, drag the tip of a stick pin through the liquid to create a marbled effect. Heat again and repeat until the Piccolo is marbled as much as desired.


Amazing the texture that can be achieved with the Piccolo Enamel Powders!!

Supplies:


Posted by Jennifer Priest